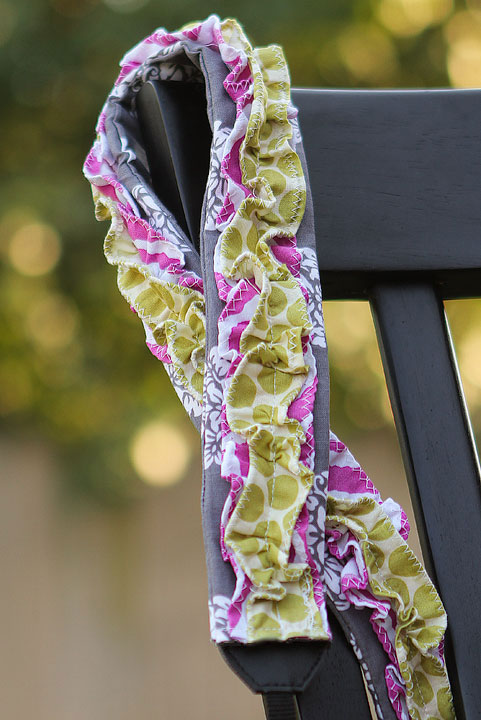
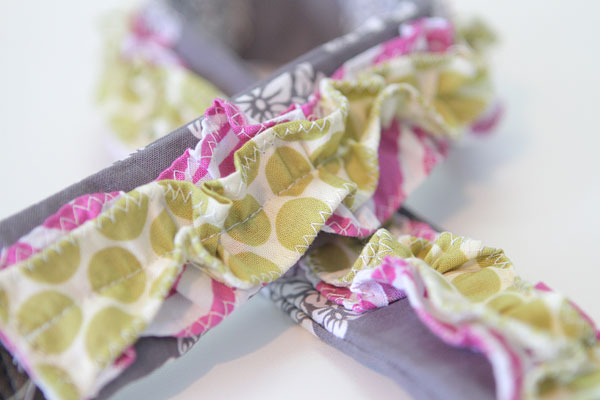
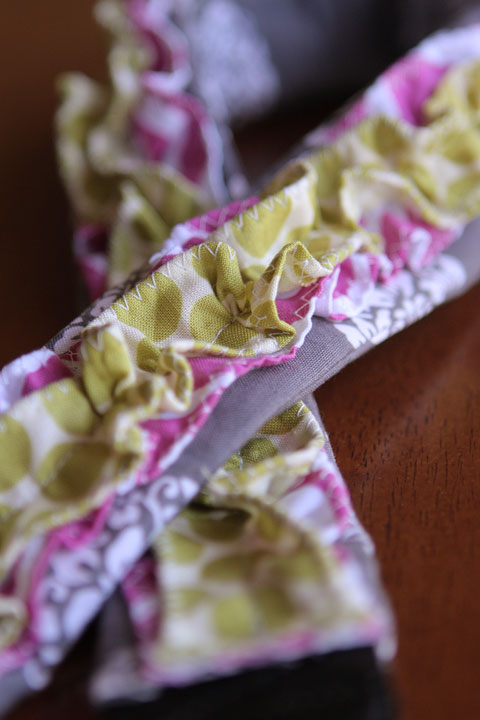
I am in love with anything ruffly and flirty – I’m totally digging the ruffled camera strap trend. And I’m really loving all the purpley grays, berry pinks, and olive greens I’ve been seeing everywhere for fall. Gorgeous. I love the idea of a camera strap slipcover that can easily be changed out with new seasons and colors. And although my sewing machine usually runs and hides when it sees me glance in its general direction, this cute slipcover was pretty easy to tackle.
Wanna make one? It wasn’t too bad… promise! Come on, I’ll show you. :)
Stuff you’ll need
- sewing machine & coordinating thread
- iron & ironing board
- camera strap
- 1/2 yard camera strap fabric
- 1/2 yard ruffle fabric
- 1/2 yard second ruffle fabric (optional)
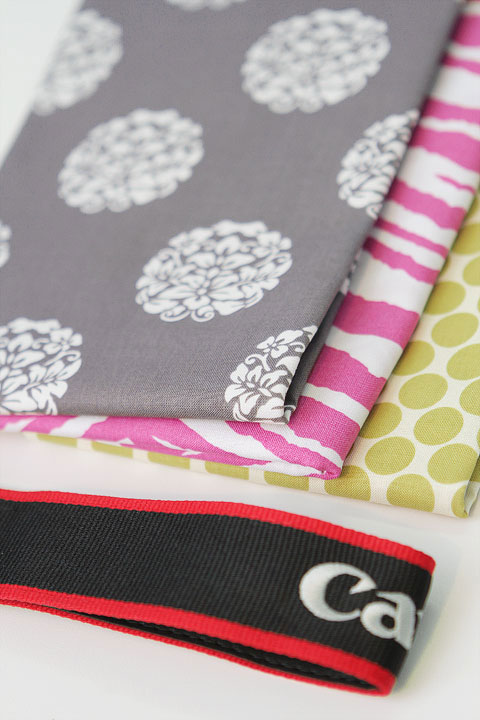
Fabric I used
- Woodland Delight Gray Bloom by Paula Prass
- Lotus Lime Full Moon Polka Dot by Amy Butler
- Party Animal Pink by Michael Miller
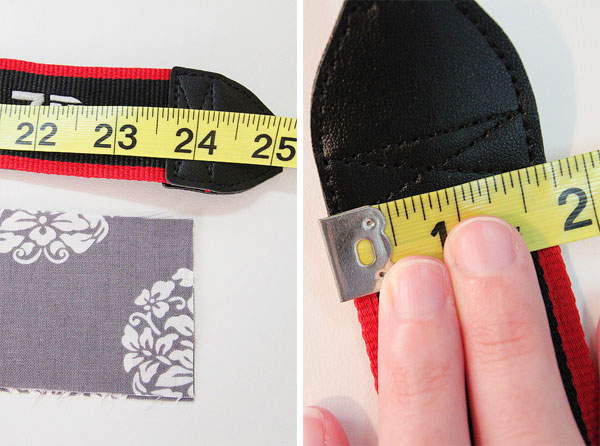
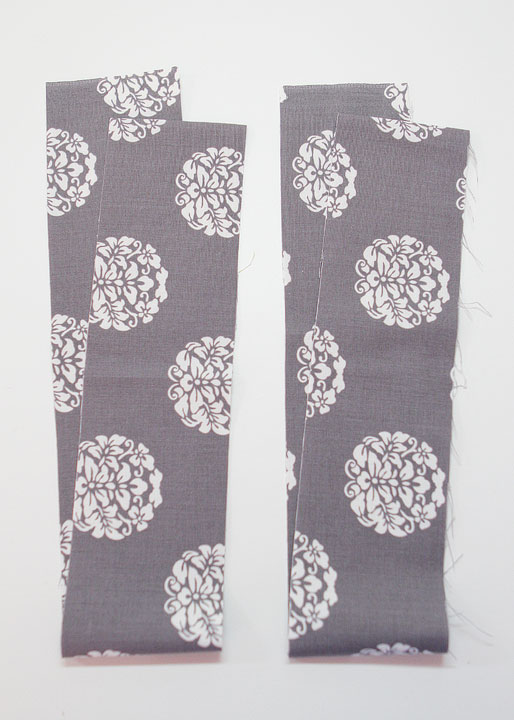
Cut 2 strips of fabric for your camera strap. You’ll want to add 1″ to the length and width of the camera strap you’ll be covering.
For the length, I gave myself a little extra room for the slipcover to hang over – I measured from the middle of the X’s on the leather ends of each strap.
For the width, measure at the widest part of the strap on the leather ends.
My measurements were 24″ x 1.75″, so I cut 2 strips of 25″ x 2.75″.
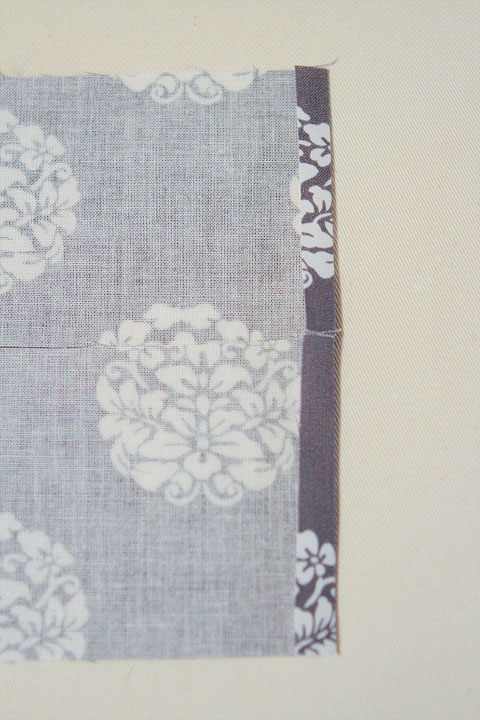
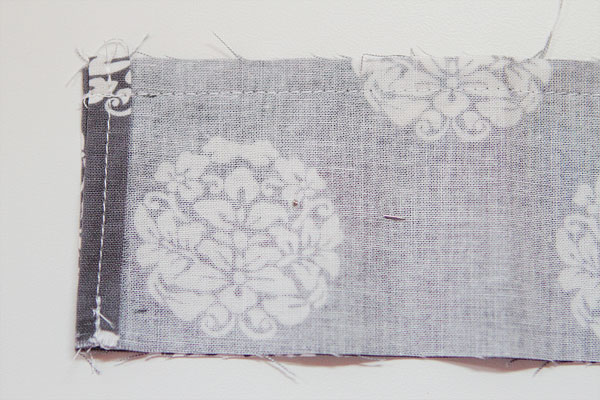
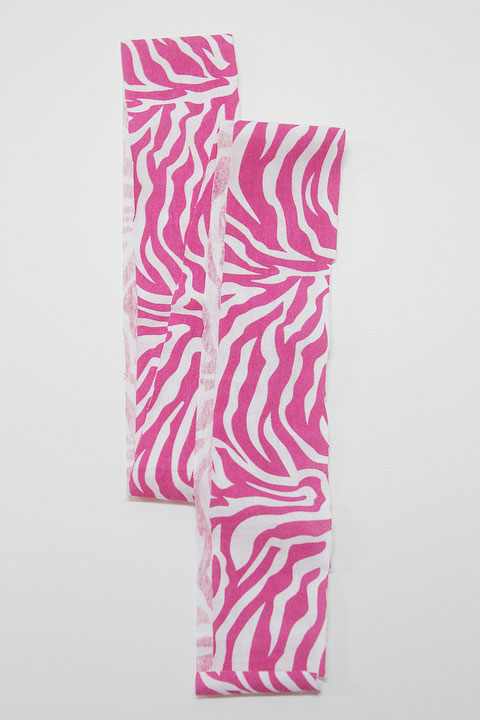
Turn the short sides of the strap fabric in 1/4″ and press. When pressing the second strip, make sure the ends line up so both strips are the same length.
Hem the short sides you just pressed, back-stitching at the beginning and end.
(That’s the button that looks like a U-turn.)
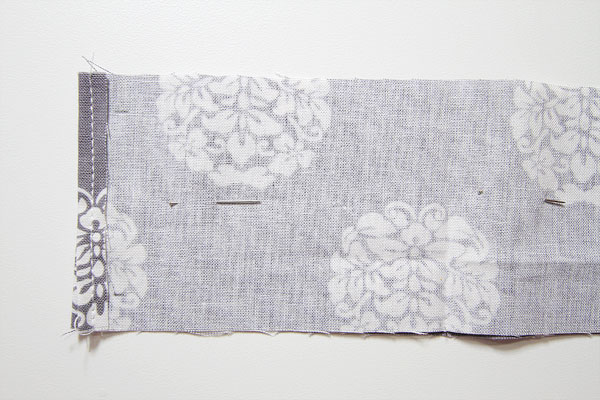
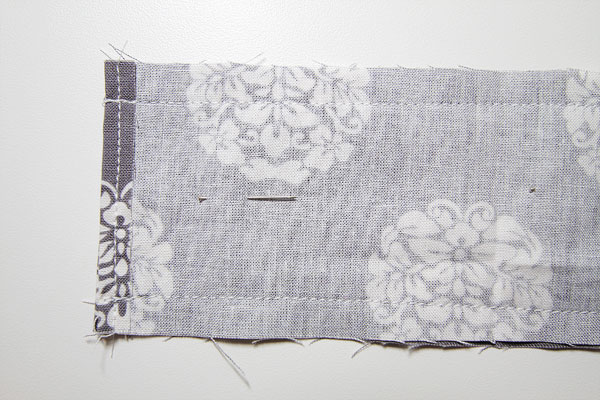
Line up the two strips and pin – right sides together.
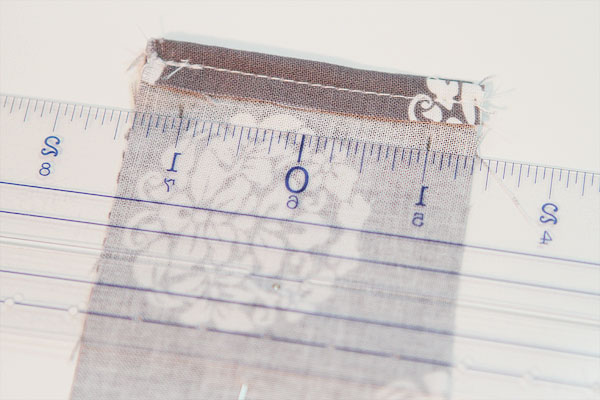
Since the width of my camera strap is 1.75″, I want my slipcover to be 2 inches wide. Use a ruler and make a pencil mark so you know where to hem so you’ll have 2″ in the middle.
This centering ruler came in handy. If you can get a picture of it upside down, even better.
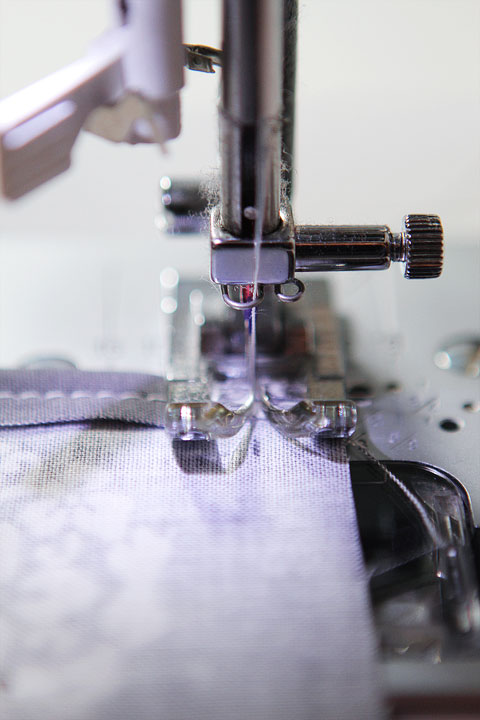
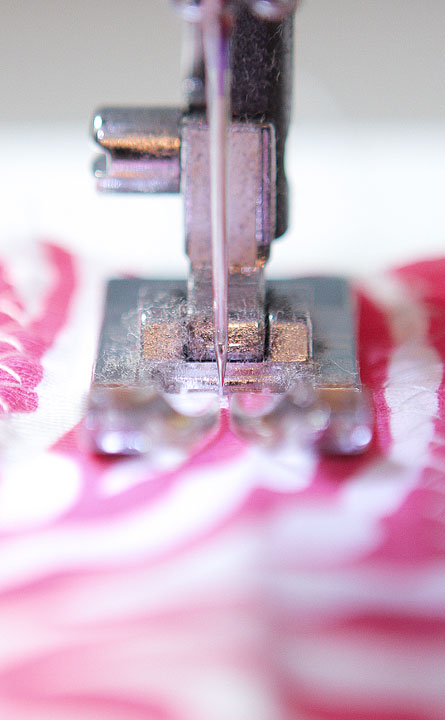
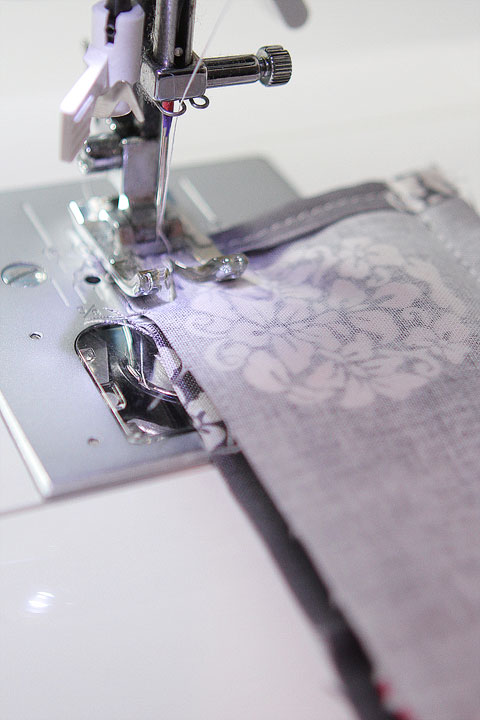
Hem just one long side of the strap, back-stitching at the beginning and end.
Embrace the dust!
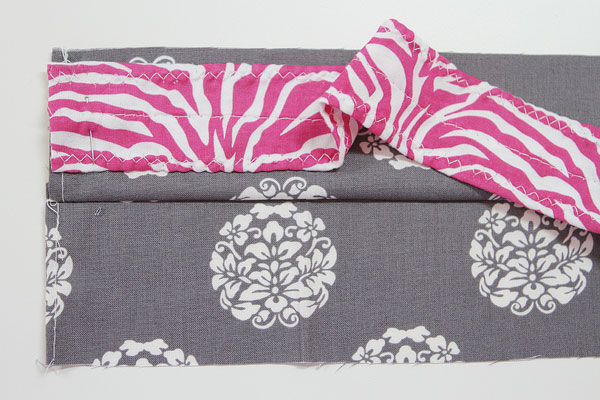
See? Just one side. Remove pins and set aside.
Now if you did want to go ahead and stitch the other side…
You’d have a very basic slipcover. Easy! You could find some super fun fabric and change this out all the time.
But today we want to add ruffles.
Cut a strip of fabric for the ruffle. You’ll want it to be the same width and double the length of your camera strap.
I cut mine 2″ x 42″.
(My fabric wasn’t quite long enough to double the length exactly, but it was just fine.)
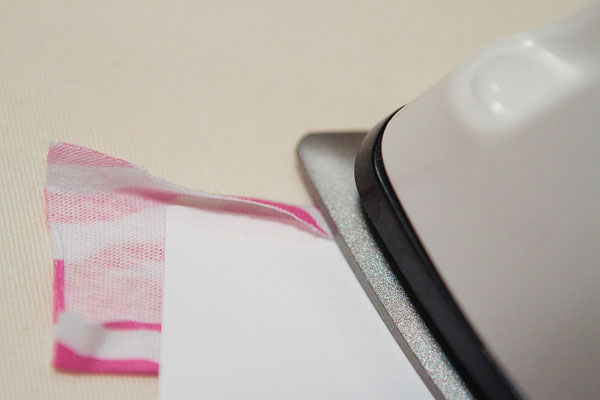
Fold in the long sides of the fabric in 1/4″ and press. Now this can be kind of tricky, so I used a piece of cardstock to help keep a straight edge.
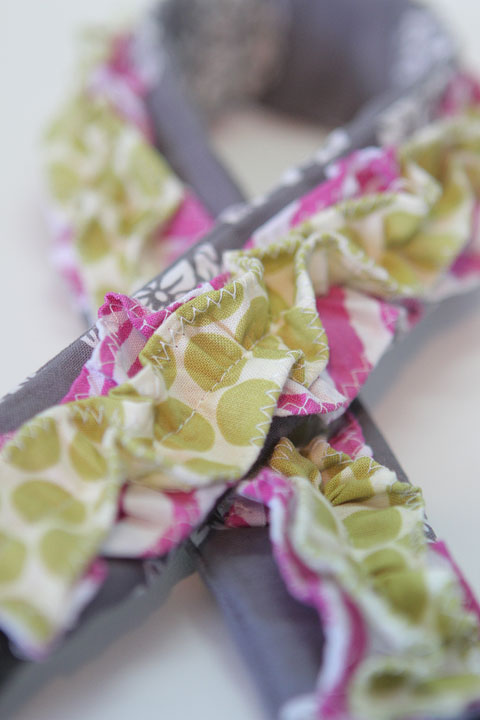
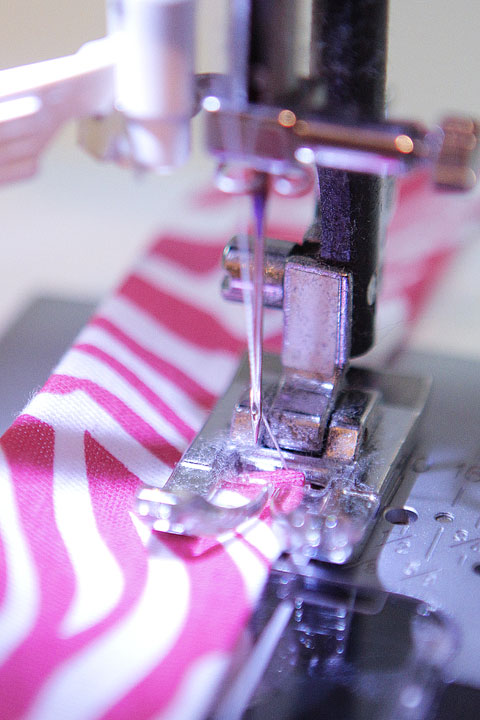
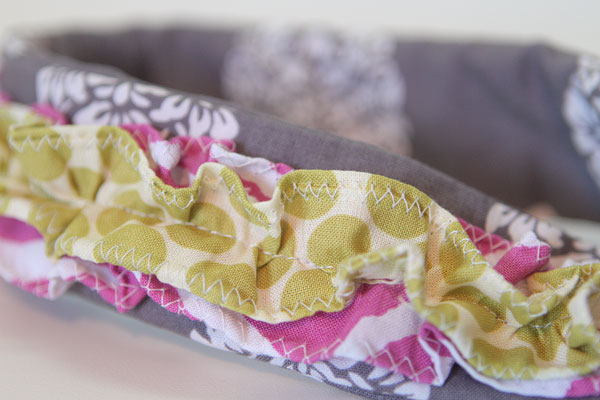
Hem the long sides of the ruffle fabric. I used a zig-zag stitch to add a little fun texture.
But you could use a straight stitch too. If you’re going with the zig-zag stitch, hem the fabric right side up – I think it looks better. :)
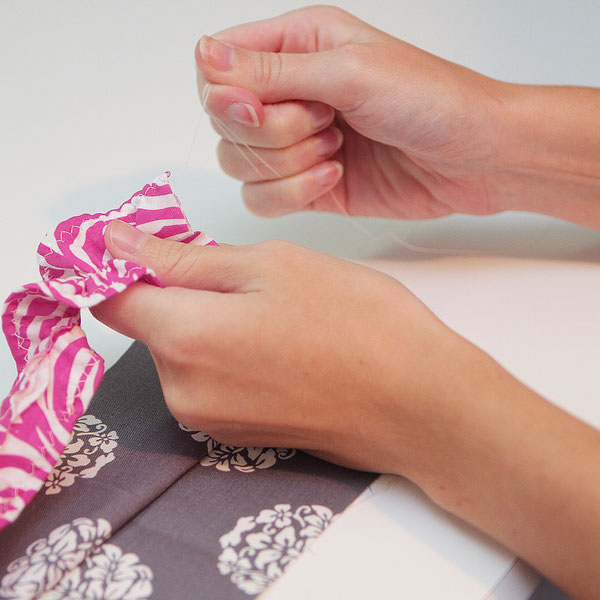
Sew a basting stitch (that’s the longest stitch your machine will do) down the middle of the ruffle fabric, leaving a long string at the end.
Now grab that camera strap fabric, open it up, and pin the end of the ruffle fabric to the end of the camera strap (on whichever side you want to be the front).
Starting at the other end, find the long strings you left. Grab the bottom string (from the bobbin thread) and gently pull the fabric to gather & ruffle.
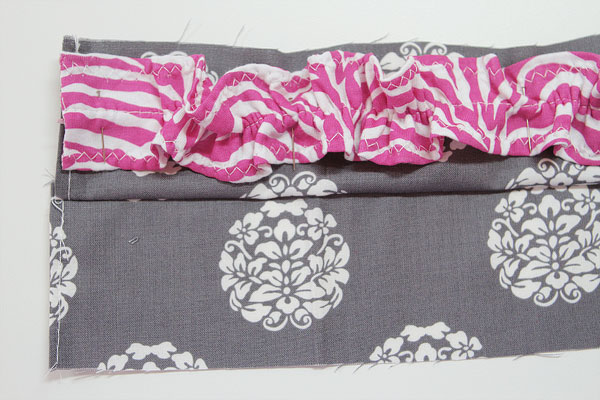
Arrange ruffle evenly onto strap, leaving about 1″ on both ends un-ruffled.
Pin and sew into place using a straight stitch right down the middle, back-stitching at beginning and end.
Remove the pins and the basting stitch. Pull the bottom thread out first, like you’re gathering again, then the top thread. Don’t worry, it should come out pretty easily! :)
Now it was looking pretty fabulous with just one ruffle, but I just couldn’t resist… I had to add a second ruffle! :)
To add a second ruffle, cut another strip of ruffle fabric, the same length, but not quite as wide as the previous ruffle.
I cut my second ruffle strip 1.75″ x 42″.
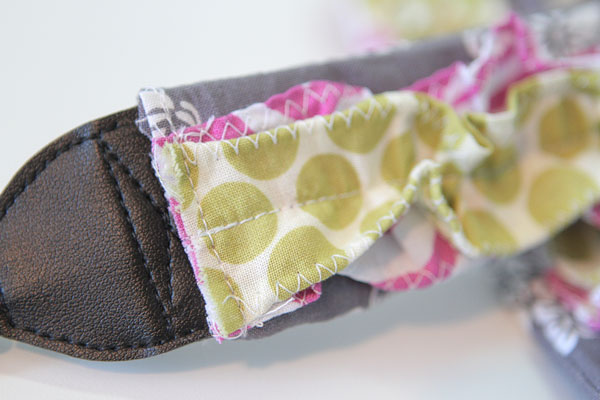
Repeat the previous steps to add the second ruffle. When you are done, you’ll want to sew a straight stitch across the short sides of the slip cover, sewing the ruffles in place at the bottom.
Now fold the slipcover over, right sides together. Find the pencil mark you made, and sew a straight stitch down the long side of the fabric to close the slipcover, back-stitching at the beginning and end.
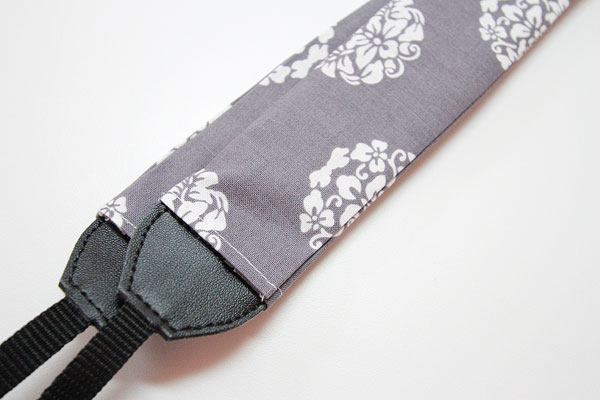
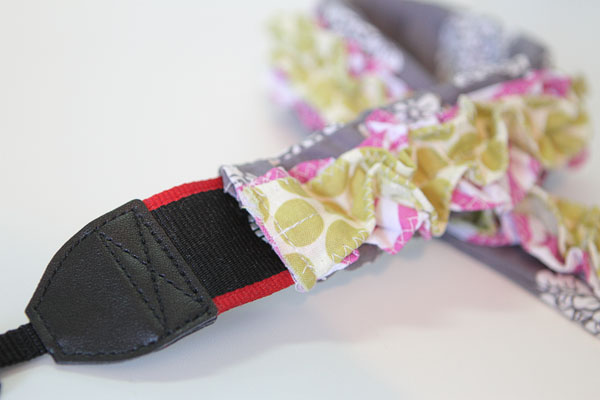
Turn the slipcover right-side out and slip onto your strap!
You now have a custom, gorgeous, ruffly, feminine camera strap! And it’s a slipcover, so you can change it out as much as you like. :)
Have a great weekend! :)









This such a cute idea! I didn’t know you liked sewing too since I’m always drooling over the food and desert posts :o) I might do this for my camera if I ever get through all my sewing projects.
can I just buy one from you?? I’m not sewing machine savvy!! lol
I did it!! I messed up a tad trying to add a bow (sewed it into the seam on the first round >.<) and took a while to flip right side out because I added some padding (those lenses get heavy) but I am so grateful for this tutorial!!! I've been wanting a new strap for a while but couldn't justify spending the $$$!!! I made a psuedo-tutorial on how I did mine on my blog and also has pics of how it came out… but linked back to Amanda's cause I absolutely LOVE the ruffles too and will be making one of these also ;)
http://www.coneyislandcalifornia.com/custom-camera-strap-diy-camera-strap-cover/#comment-55
Great first project for my daughter. Thank you.
I LOVE this! how much would you charge for one? I dont have a sewing machine and i really want this strap cover. :) Thank you.
I’ve been shooting since high school and never thought to cover my strap. Great idea and great site. I love being crafty, so I will be attempting this soon!
Hey! i love this. i have a camera, but not a strap like this. instead of covering the strap, could i just make it and attach it to my camera with clips???
(i found you via PINTREST by the way!) :)
I’m planning on getting the Canon EOS Digital Rebel XTi.I was wondering if any person has had knowledge with this digital camera or if there is a better slr camera out there? I essentially care for something that is simple to navigate because its my first time with a quality camera.
I recently made a quilted camera strap cover and will definitely be making this for myself and as gifts! Thanks for the super-easy-to-follow tutorial!
When I found this tutorial I was so excited. I LOVE the idea, and when I made it, I loved it even more. :) The only thinsg I did differently were, I only bought 1/8 yard for all three fabrics (I still had PLENTY left), and I made my ruffles a little wider. You can see the finished product here: http://kristin-korner.blogspot.com/2011/10/sew-your-own-camera-strap-slipcover.html. Thanks again for the awesome tutorial! :)
just found your tutorial and i am SO excited to try this out! THANKS for being so detailed in your post!
I just made it!! and I am in love with it! I will now be making one for my two sisters!
This was the first sewing project I attempted on my own. (Big time novice here.) I am now about to make my 5th one. My friends and family love them! Thank you for such a great tutorial.
Hey there! I just found your sight and love it. Thank you for the tutorial and can’t wait to get started on my lovely strap. :D
Amanda,
I made two of these super fun straps.
One for my Nikon and one for my friends Cannon – we both love them!
Thanks so much!
Much love from New Mexico
I loved this tutorial and had to make the camera strap slip cover! I linked over to your page when I posted mine!
http://jandrzoo.blogspot.com/2011/03/camera-strap-slipcover.html
This was a great post!!! I am your newest follower and hope that you will come be a follower at my blog!!! brooke
brookedouglass@yahoo.com
Girl Boy Girl Inspired
I love your tutorial! Thank you so much for posting it. Here is the one I made http://appetizerforacraftymind.blogspot.com/2011/02/girly-ruffled-camera-strap-slipcover.html
Done! I added a rosette ;)
http://www.facebook.com/photo.php?fbid=166154660099669&set=a.166154656766336.36275.124765877571881
THIS IS THE HARDEST THING EVER.
I love this! I have got to make one for my sister!
Can’t you just send me that one? lol
I FINALLY was able to sit myself down and make this strap!! One of the things I hated about my Canon strap was that it was just so HARD it hurt to have it around my neck, so that was what helped me decide on a soft flannel, plus it was a super cute argyle pattern. I LOVE LOVE LOVE my new strap cover, thank you so much for this tutorial!! P.S. Making the ruffle wasn’t that easy, but I’m wondering if there was a better thread to have used, mine got jammed in a few places once I started pulling, but it all worked out :-)
Since the snow was coming, I figured I’d dust off my machine and give it a whirl. I lucked out at JoAnn’s and found some awesomely cute Debbie Mumm fabric…$7.99 a yr and 50% off…I’m not really good at measurements, but after picking out 3 sets of different co-ordinating fabrics (they are so adorable), and getting home, my mom (via phone) said the 1/2 yrd fabric seemed like a lot…I am now on strap #5 and still have enough for 3-4 more! I’m guessing I will put them up on etsy as they are so adorable! Thanks for the cute idea Amanda. If I ever get done sewing, I will get back to taking pictures and blog about them! And maybe post a pic or 2!
btw…I also wondered about the non-hemmed ruffle, but figured to each their own and hemmed mine anyway. These things happen! :)
I LOVE your camera strap! I didn’t order my fabrics online – just found ’em at JoAnn’s.
Here’s how mind turned out.
From Projects
And here’s the fabrics I chose:
From Projects
Just finished this for my camera strap, very rough edit as I was fighting with the sewing machine in beginning, but I LOVE it! Thank you! I will be sending people over to check it out themselves!
This is one of my favorite posts!
I tried this out and LOVED it! It’s so convenient to slip on a cover and then put another one on depending on my mood!
Check out the 2 slipcovers I have made so far, thanks to you!
http://acontenthousewife.blogspot.com/2010/11/diy-fabulous-camera-strap-covers.html
Oops!
Wrong link! It should be:
http://thestewartestate.blogspot.com/2010/11/diy-fabulous-camera-strap-covers.html?spref=fb
Thank you for the awesome tutorial! I can’t wait to fancy up my camera strap.
Love this idea…now if I only had a sewing machine. I will definitely have to get my grma to do this for me unless you can use glue like the previous post.
I have a question–for those that do not have a sewing machine, can we use one of those –(what are those glues called???) No sew hem? in place of sewing, then hand sew the ruffles?
Thanks!!!
Just made one of these for my friend for Christmas….
SOOOOOOO CUTE!!!! It turned out absolutely adorable! Thanks for the awesome idea!
– Kaitlyn
LOVE IT! I have 3 DSLR cameras and the straps are so ugly right now and they need replaced…this idea is awesome, I am going to blow off the dust on my sewing machine and get busy on a few of these, you have a great blog….LOVE IT ..too.
Jodi
Amanda,
awesome idea to girl up your camera(s)! Even better girly gift idea for friends who like to shoot too! THANKS!
Thank you, thank you, thank you! I’ve been wanting a strap cover, but didn’t really want to buy one! This tutorial looks super simple and I can’t wait to give it a try!
I think I missed something. Did you leave the short ends of the ruffles un-hemmed? Are they just raw edges still?
Ummm… *blush* Yes. I did. This is why my sewing machine gives me attitude. It’s rolling its eyes and dying of embarrassment right now. :)
Hey Amanda! :D I love this so much, I like to sew because it’s simple and doesn’t take much skill besides concentration and dedication! :D
I was wondering, is there any way to adjust this to make it a water bottle strap? You know, like the ones that hook around the lid of the water bottle and you hang it from your neck? I would love to make one of those with this pattern because it’s just so cute! :D
Thanks so much for being so fun and positive, every time I read your blog I smile! :D and I even advertise your blog on mine. :]]
Loves n kisses n all sortsa wishes,
kranberrie♥
LOVE this! Definitely going to be making one!
I told my husband about this project. He said “Be prepared for me to never touch the camera again.” I said perfect… all mine. : ) lol
love this strap! I’m a novice at sewing, so this is a perfect project for me! Already have my fabric and everything, just gotta get motivated! I may try it today! Thanks for all your great tips!
adorable!
Love this idea – must pass along to my crafty photographer friend. Thansk for sharing your great ideas!
LOVE it! I would make one, but I can’t even sew on a button:)
I look forward to meeting you at Blogher Food next week. I am loving your site!
Holy Moly I love your blog! I have been stopping by for a couple of months now and even made the picture frame earring holder..btw it is so cute and handy too…my husband thanks you! haha I just started sewing and think this looks like a contender for Christmas presents for my photo-taking friends! And I cant wait to make the chocolate chip cupcakes. I am pretty sure I gained 5 lbs just reading the recipe :) Again, I LOVE LOVE your blog! Thanks for the tutorials!!
Can I have it? :) I LOVE it!
Hey Amanda! :D I love this so much, I like to sew because it’s simple and doesn’t take much skill besides concentration and dedication! :D
I was wondering, is there any way to adjust this to make it a water bottle strap? You know, like the ones that hook around the lid of the water bottle and you hang it from your neck? I would love to make one of those with this pattern because it’s just so cute! :D
Thanks so much for being so fun and positive, every time I read your blog I smile! :D and I even advertise your blog on mine. :]]
Loves n kisses n all sortsa wishes,
kranberrie♥
You’re the cutest!! Thanks for this tutorial…..I’ll be trying it out tomorrow :)
I LOVE this idea so much! I can’t wait to try it out. I liked it so much I had to share it on my blog too. I hope you don’t mind!
http://sweetrosestudio.blogspot.com/2010/10/camera-strap-re-do.html
LOVE THIS! Those fabric colors and patterns are beautiful! Great tutorial!
Thanks for sharing. Love your fabric choices!
You make it look so easy! I tried to make one without ruffles once, and it was NOT as easy as it looks! (I got a little narrow in the middle)! The one you made is SOOO cute!
love .. love …. love …
I want to make it now!!! But must finish editing and ordering a few session first.
Thanks for the great step-by-step-directions.
So excited!!
I can’t get enough of your blog! I just made one of these today. Not only is it much cuter but the old Canon strap kinda rubbed my neck after long periods of time. Thanks!!
That’s the easiest camera strap cover tutorial I’ve ever seen and I can’t wait to give it a try!
Thanks!!
So cute Amanda, even though you ran 5 miles to make it! :)
went and got my fabric as soon as I saw this!! I just made one a few weeks ago but this one is SO much cuter! thanks for all your awesome ideas, fonts and recipes!!!! LOVE LOVE LOVE your blog!!!
~m
Thank you so much. I love this fun idea!
Darling idea and good directions. Thanks a ton.
VERY cute!
Ashley
How cute!!! Love it, and love your fonts, and your crafty “how-to” blog entries. Keep up the great work Amanda!!
Too cute! I hate the way the camera strap feels on my neck and that is the perfect solution to stop the scratching! Thank you so much for the pattern and tutorial.
You finished it!! And it looks amazing!! I especially love those colors together! I always love gray and this season I’m really loving the olive tones I’ve been seeing! Yay for you!!! :)
I can’t sew but I sent this to my mom so she can hopefully make me one for Christmas! Thanks!
LOVE LOVE LOVE this….printing out the pages so I can have mine ready for when I get my camera here in a few months!!
Fantastic idea! Thank you so much for the step by step tutorial!
So cute! Cant wait to make one! You are so talented!
Okies! This is super! I just need a really nice camera to go with it! My little point and shoot would not do it justice. I think I will make a few, then hang them around the house, just to get the significant other’s curiosity up, then hit him up for the new Olympus Pen that I want for my Birthday (which he forgot, back in July) Should be a good way for him to make it up to me. I need one to go with the oh so sweet straps! Awesome work there Amanda!
Going to a gymnastics clinic this weekend, but I have printed ALL 26 pages to make this fabulous strap cover next weekend!! LOVE IT!! Thanks Amanda!!
This is great! I love the idea of being able to change out the strap cover! thanks so much for sharing! I may make one today :-) one question, though? why the 1/2 yard fabric requirements per fabric? it seems that 1/8 yard would be plenty for the ruffles & quite possibly, even the cover itself…..
Hi Tracy! Yes, you are right! :) 1/8 yard for the ruffle and 1/4 for the strap would be plenty, if you don’t mess up at all. :) I just put 1/2 yard because if you buy the fabric online, that’s usually the smallest increment you can buy it. Hmm, maybe I should change it. I went back and forth with myself. We fought. The other guy won.
Wonderful tutorial and something I should make.
I haven’t put a strap on my camera and when I am walking, regret not having it on, so maybe I would wear it, if i had a comfy and fun strap.
Debbie
Wow. Cute! ruffles not really my thing but the basic slipcover would be cute. Too bad my strap is wonky! It’s not straight so it is more comfortable but would be hard to measure for…pity!
Thanks for sharing all your great stuff!
Great job, I so wish that I had your talent on everything. The only thing that I could do was make those cookie dough filled cupcakes .. YUMMY :)! The ruffled strap would be to hard for me to make but still, it is awesome.
Ahh this is adorable. I’m soooo gonna make one! :)
Oh my gosh Amanda, I LOVE it! Great job, it’s beautiful!
I love, love, LOVE this!!! I’m making this for me and my BFF immediately!!!! We are making plans for a girl’s weekend in NY the first week of December and this would be a great gift for her! Thanks!
I’d love any ideas for hot spots to visit while in NY. This will be my first trip- I’ve dreamed about it since I was a little girl! :-) There is soooo much to fit in to one weekend! Any advice would be great!
Thanks for your blog! I love it and know if you lived in Raleigh,NC we’d be besties!!!!! ;-)
Hi Deborah! Here’s a map I made of all the places I wanted to go in NYC:
Amanda’s NYC Map
I didn’t get to all of them, but check my NYC posts for the highlights!! :)
Amanda’s NYC Trip
Have fun!!! :)
Thank you for this!! I can’t wait to make one
Great idea! How do you come up with these things. Your mind is a bottomless pit of information (I mean that as a compliment, lol). Thanks so much for sharing all u do with us. Keep them coming.
I LOVE this tutorial and can’t wait to pull out my sewing machine and change my Canon camera strap into something pretty!
I love your blog. :-) Rita
Thanks for this. I love the ruffles trend also. I have a friend who would love one of these.
Super cute!! I love it.
One thing I like to do is make my own camera bags for my cannon digital elf, allows me to make something nice, little and cute and this way I have my own design, with a zipper pocket on front to hold my extra memory card and battery, but yet small enough to just keep in my purse.
Amber–I found this at I Heart Face Forum
By–Brittney Woods-Chaney on October 4, 2010 at 1:31pm
Unfortunately, I didn’t take photos of every step but I would love to tell you how I did it! It was so easy, and took less than 30 minutes!
Supplies:
Purse ( I got mine on sale for $20)
1 yard of fabric for lining
foam padding ( I got two squares at Hobby Lobby for 1.99/ea)
Scissors
Hot glue gun & Glue
First I cut a piece of padding to fit the bottom of the bag, then each side.
Then, I put them in the purse (to make sure they worked). Then I played around with putting my camera body and lenses in to see how I wanted it to be divided. After I figured that out, I cut a few divider pieces of foam.
Next, I took each piece of foam and covered with the fabric. (Cut it, then glued it. I didn’t feel like whipping out the sewing machine, but you obviously could. I just glued mine like you would wrap a present.)
After I wrapped each piece of foam I had cut with my fabric, I glued the bottom and side pieces together (So I had a base pieces to just set in the purse!)I decided not to glue the divider pieces because they stay in place well on their own, and if I wanted to rearrange them in the future it would be super easy.
I also decided not to glue the padding into the purse because it fits well and stays in place, plus I can easily make more than one lining to switch out! :)
My camera is broken and I never use my strap… call me lazy, but THIS was inspiring and oh SO cute! I have three girls (all under 6) but they thought it was TOO cute and want me to make something for them with straps. Hehahaha… first I need to learn to use a sewing machine… YOU have inspired me to learn to sew!!! You made a really cute tutorial I think ages ago about a patchwork quilt… I am just so impressed with your brain and the way you think and see things and how everything makes you so excited! Thanks for letting us all over the world follow along inside your head ;)
DO you buy your fabric online, like from the links you posted? Or did you find these in stores? I feel like all the cute stuff is only available on line, but that it is more expensive and you have to pay for shipping…
I ADORE this! It’s too precious! And you could make cute ones for every occasion (college sports team, Disney, Christmas, puppies!) Oh goodness, I am so excited! Thanks, Amanda!
Omigosh! I’ve been wanting to buy a new camera strap (even though I still don’t know how use my camera very well) since I got my camera. but since I can’t justify buying one… I can totally make one! :) LOVE THIS!
LOVE this idea! I’ve been wanting to make a camera strap for myself, and this is perfect. “Sew” simple! ;)
That is too cute. I love it. I want to make a few of those to make the sports my kids play. :)
ah, this is so cute!
Thanks for this awesome tutorial! The strap is super cute- I’ll be making one of these!