Want to take a silhouette photo in front of a pretty sunset or bright light? Here’s a quick & easy guide on how to take silhouette photos on your iPhone or DSLR camera!
How to Take Silhouette Pictures
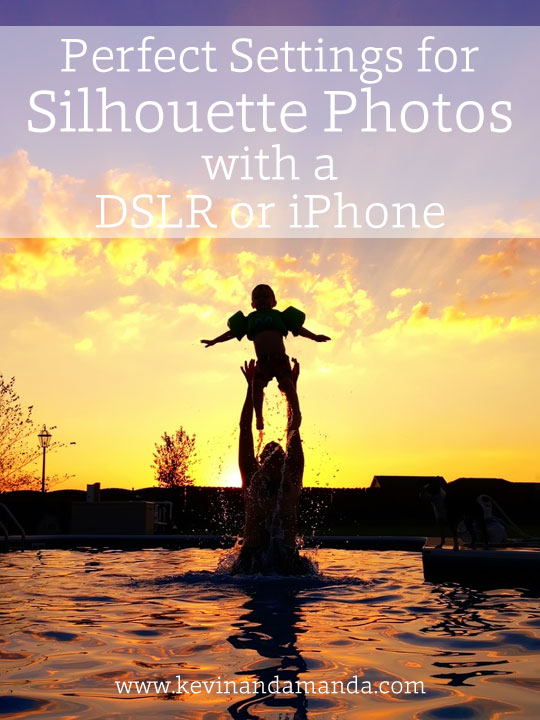
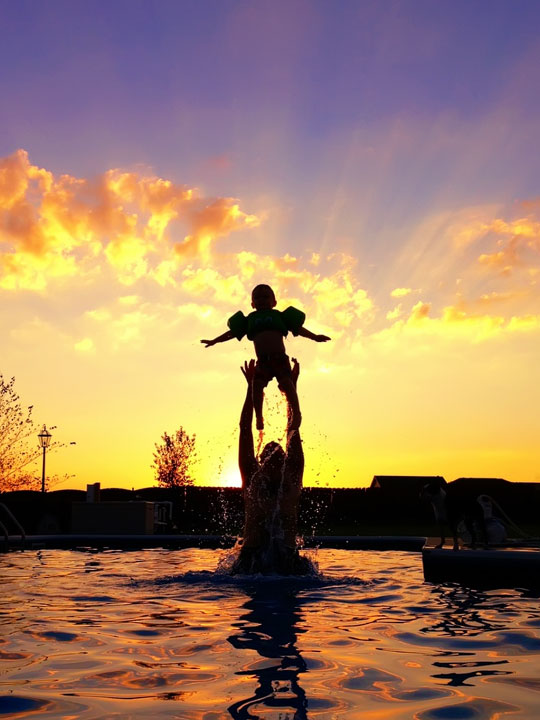
A few weeks ago I posted this photo on my Instagram account, and several of you requested a tutorial on settings to use for silhouette photos. So here it is!
I took this particular photo with my iPhone, so I decided I would share a tutorial for both! :) Below I will you show you my 4 easy steps for Silhouette Photos on a DSLR *and* an iPhone. Fall sunsets happen to be my favorite, so this is the perfect time of year to practice silhouette shots! :)
Easy Tips For Great Silhouette Photos on a DSLR
1. Take a picture of the brightest part of the sky (i.e. the sun at sunset). Zoom all the way in so that the sun is completely filling the picture, as much as you can.
Note: If you want to capture action (i.e. people jumping in front of a sunset) be sure and first put your camera in shutter priority mode and set your shutter speed to at least 500. For more about how to take action photos see this post: How to Take Tack-Sharp Action Photos
2. On the back of your camera, press the play button to see the picture you just took. Then press the INFO or DISP button*. This will bring up a screen with information about the photo. Press it a few times until you see the aperture, shutter speed, and ISO used to take that picture.
*This button may be slightly different depending on your camera’s make and model. If you don’t see this button, do a Google search for your camera’s name and “playback display” (for example, “Canon 7D playback display”) to see how to do this.
3. Once you’ve determined the aperture, shutter speed, and ISO used to take the photo of the sun, switch your camera to manual mode and input the settings from the sun photo. This is the easy way to shoot manual! :)
4. Now just snap away! :) Get low to the ground and position your subjects in front of the sun. Focus on them as you take photos. They will be silhouetted out and the sky will be bright behind them.
How to Take Silhouette Photos on an iPhone
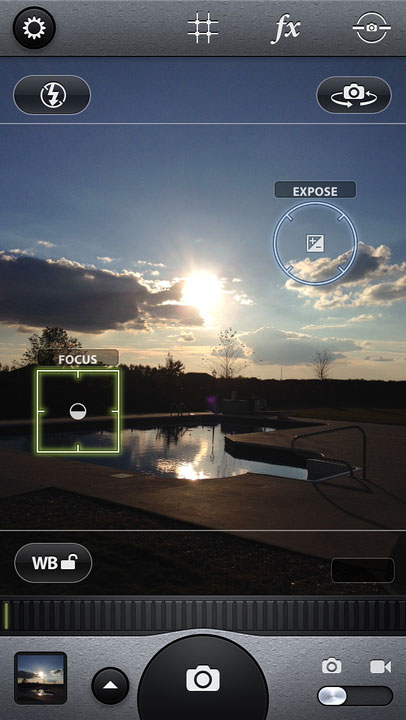
I know there are many camera apps that can do this but I use Camera Awesome. It’s free and you can download it here.
1. Touch 2 fingers to the screen and two boxes will appear: Focus and Expose.
2. Drag the Focus box to the middle of the screen, or about where your subject will be.
3. Drag the Expose box to the brightest part of the sky (for example, right on the sun).
4. Put your subject in front of the sun or bright sky and snap away! :)
If you have a favorite camera app that will do this too (iPhone or Android), please tell us in the comments!
For More Photography Tutorials, be Sure to Check Out the Posts Below
- What Settings Should I Use?
- What Settings Should I Use? Part 2
- How to Take Tack-Sharp Action Photos
- What Lens Should I Choose?
- A Quick Guide to Understanding Your DSLR Camera
Here’s a List of What Camera Apps I Use on my Phone
And just in case you are ever wondering, you can always click on any photo on my site to see the camera, lens, and settings used. :)
Hope this helps!! Have a great day! :)




Hi
Thanks for sharing this useful tutorial
Thank you!!!!!
Thank you!! I use camera+ for iPhone. Works great as well
thanks sir. thanks a lot…..
Great information…
WAR EAGLE !!!
THANK YOU its a nice idea… but one thing I want to ask about the silhouettes picture taken .. you told the shutter at least 500 what about the aperture and ISO what should the speed should be? I have my Nikon Camera… :)
Thank you for sharing this tutorial with us.
Best regards, (since Brazil) ;)
Great blog – lightroom I find is great for beginners, you can learn a lot about post processing with this.
Thanks for the tutorial. Not long ago I was trying to get a silhouette shot. It proved to be much harder than I originally thought. I did end of getting one but this will be great to pin and share with others.
This is great, thank you for the camera app info. Is there an app you like for creating collages?
Amanda, my biggest struggle is my white balance. Since I work 40+ hours a week, many of my photos are under tungsten light after dark. They come out so yellow! I’ve tried using the tungsten light setting on my Canon Rebel, but it doesn’t always quite do what I want. I do fix up my photos the best I can with a Photoshop-type program, but that also doesn’t always give me the best results. I would love to see a tutorial on white balance! Thanks, love your blog!
I assume you mean you are shooting outside in the dark or indoors under artificial light. It sounds like you have set a weird custom WB so the First thing to do is clear all your camera settings, look in the menu under the settings tabs for this option. For low light photography it’s best to work in creative modes so if your new to them start with the P program mode. Set your metering to evaluative and the ISO and WB to auto and take a test shot. If it’s too warm (yellow or orange) then change the WB to the tungsten setting and take another shot. This should ‘cool’ down the exposure. Sometimes only part of the shot is causing the problem due to a particular light source so experiment with centre and spot metering to see if you can avoid it effecting the whole exposure by concentrating on your subject and not peripheral light. Remember 3 things effect exposure, speed, aperture and ISO so try increasing the ISO to 400-1200 depending how dark your scene is – the lower you can keep it the sharper your image will be. Finally try’s brighter lens do you can open up the aperture by setting a low f number of say f2.8 – 4. Hope this helps.
This is a great tutorial!!! I’m glad you posted this on Facebook again tonight. I was wanting to check out the link the other night but my internet went down. Pinning this now!
Okay – Camera Awesome now download. Thanks!
Love this Amanda! Thanks for sharing!
When using a DSLR what setting are you starting on? You say to switch to Manual Mode, but from what? (Thanks for sharing these tips!!!)
Start on full auto that’s the green square or P program mode and the camera will choose the best settings based on the evaluation of the light. Kim
Great! :) Do you think the same could be done for silhouettes and Christmas tree lights? I love that idea for Christmas cards. Take a picture of the light and then figure out the setting and then take a picture of the child tangled in the lights?
Great tutorial, Amanda! I appreciated that you shared how to do it on a regular DSL and an iphone. Thanks! :)
Thanks for another awesome tutorial!!
Love it, you take such good pictures! Next year we are planning a trip to Yellowstone (driving) and this will be helpful. What type of camera do you recommend for the intermediate for good distance shots? Need to buy one and want to get it soon so I know it before our trip.
This is so awesome. I’m totally going to try it — and download Camera Awesome!! :)
Wow. You are good! Thanks so much for sharing!
Yay for tutorials! Thanks for this one!
Great tutorial-thanks for sharing.
Thank you for this! I always find your tutorials clear and easy to understand.